

GFS Mobile | After Purchase Guide
What Happens After You Pay for Your GFS eSIM?
See how your eSIM is generated and delivered after payment, what your installation page looks like, and how to install your eSIM using Quick Install, a QR code, or manual setup.
What Your eSIM Looks Like After Payment
After your payment is confirmed, your eSIM is generated automatically. Below is an example of the installation details you will receive.
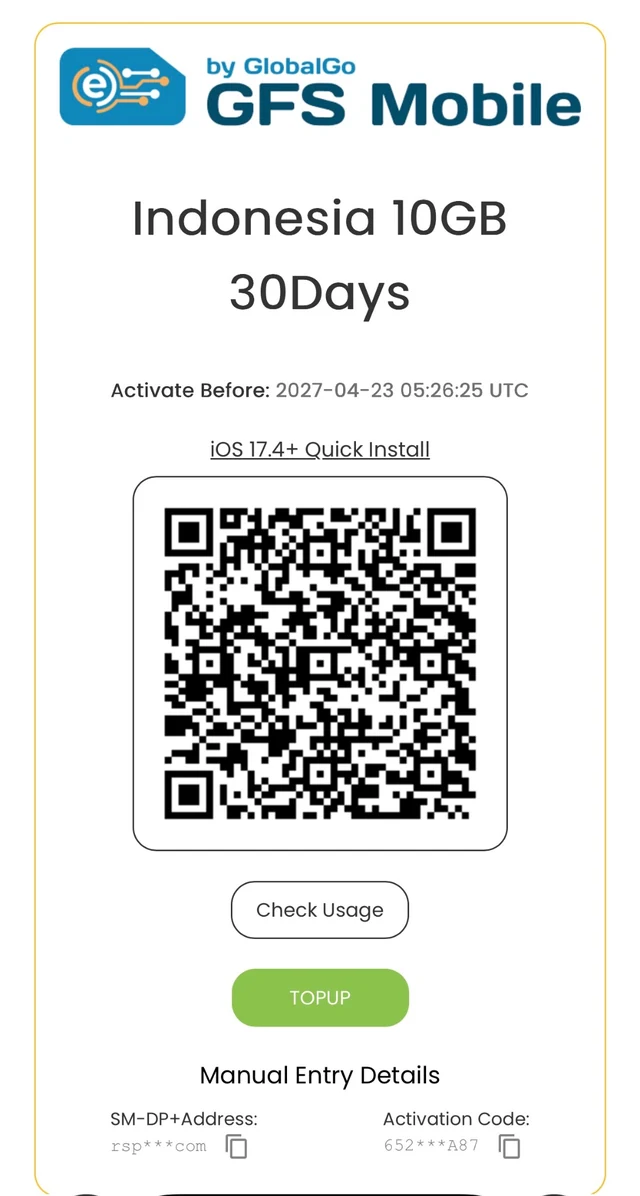
Your eSIM Is Ready After Purchase
After completing your online payment, your GFS eSIM is generated automatically and delivered by email. Your installation page contains your data plan, activation deadline, installation options, and tools for managing your mobile data.
What Is Included in Your eSIM?
Example of the selected package.
Depends on your selected plan.
Direct setup on supported iPhones.
Alternative installation method.
Review your data consumption.
Available options depend on your plan.
Your installation page also displays an Activate Before deadline and manual installation credentials. Check the exact details of your purchased package.
Choose Your Installation Method
You can install your GFS eSIM automatically or scan the QR code. Manual installation is also available when needed.
Quick Install on iPhone
On supported iPhones running iOS 17.4 or later, you can install your eSIM directly without scanning a QR code.
- Open your GFS eSIM installation page on your iPhone.
- Tap iOS 17.4+ Quick Install.
- Follow the instructions displayed on your device.
- Confirm the installation of your new eSIM.
- Configure your mobile data settings when ready to use the plan.
Install Using a QR Code
Your installation page includes a QR code that can be used to add your eSIM on compatible iPhone and Android devices.
iPhone
- Open Settings.
- Go to Cellular / Mobile Data.
- Select Add eSIM.
- Choose Use QR Code.
- Scan your GFS eSIM QR code and follow the instructions.
Android
- Open Settings.
- Go to your SIM or mobile network settings.
- Select Add eSIM or the equivalent option.
- Choose QR code installation.
- Scan the code and follow the on-screen instructions.
Device menus may vary. If the QR code is displayed on the same phone, you may need another screen or a supported alternative installation method.
Manual Installation
If Quick Install or QR code installation is unavailable, use the manual installation details provided on your GFS eSIM page.
Select manual eSIM installation in your device settings and enter the provided details exactly. Keep your activation credentials private.
How to Connect in Indonesia
After installing your eSIM, follow these steps when you are ready to use mobile data:
- Open your mobile network settings.
- Enable your installed GFS eSIM.
- Select GFS eSIM as your mobile data line.
- Enable data roaming if required by your plan.
- Follow the activation instructions and connect to a supported network.
Important: Installing an eSIM does not always activate its data plan immediately. Activation timing and validity depend on your selected package.
Manage Your Mobile Data
Check Usage
Select Check Usage on your eSIM page to review your mobile data consumption and available balance.
Top Up Your Data
Select TOPUP to view additional data purchase options, where available for your eSIM package.
Before You Install
- Use an eSIM-compatible, carrier-unlocked device.
- Connect to a stable Wi-Fi or internet connection.
- Keep your purchase email accessible.
- Check the Activate Before deadline.
- Do not share your QR code or activation details.
- Do not delete an installed eSIM unless instructed by support.
Ready to Get Connected?
Buy your Indonesia eSIM online, receive it automatically by email, and install it using the method that works best for your device.
Get Your Indonesia eSIM →Installation methods, setup time and network availability may vary by device and plan.
Welcome to GlobalGO Mobile 🙋♂️
You can connect with us through WhatsApp, Facebook and Email.